One year, my Hebrew school taught a sufganiyot-making class as part of our annual Hanukkah celebration. Allowing 25 preteens to work around a deep fryer and piping bags full of jelly was absolute chaos, and I’m sure the cleaning staff was scrubbing jelly and oil off the walls for a week. Despite the pandemonium, getting to eat doughnuts—fresh from the fryer and oozing with jam—alongside my friends remains one of my top Hanukkah memories.
If you’d like to enjoy a jelly-filled treat for the holiday but avoid the mess, these sufganiyot cupcakes are a great option! They’re a much more kid-friendly project as well. Since the cupcakes are made in one bowl, they present lots of great opportunities for kids to stir. To double down on Hanukkah festivity, I recommend making the mini coconut “latkes” as cupcake toppers!
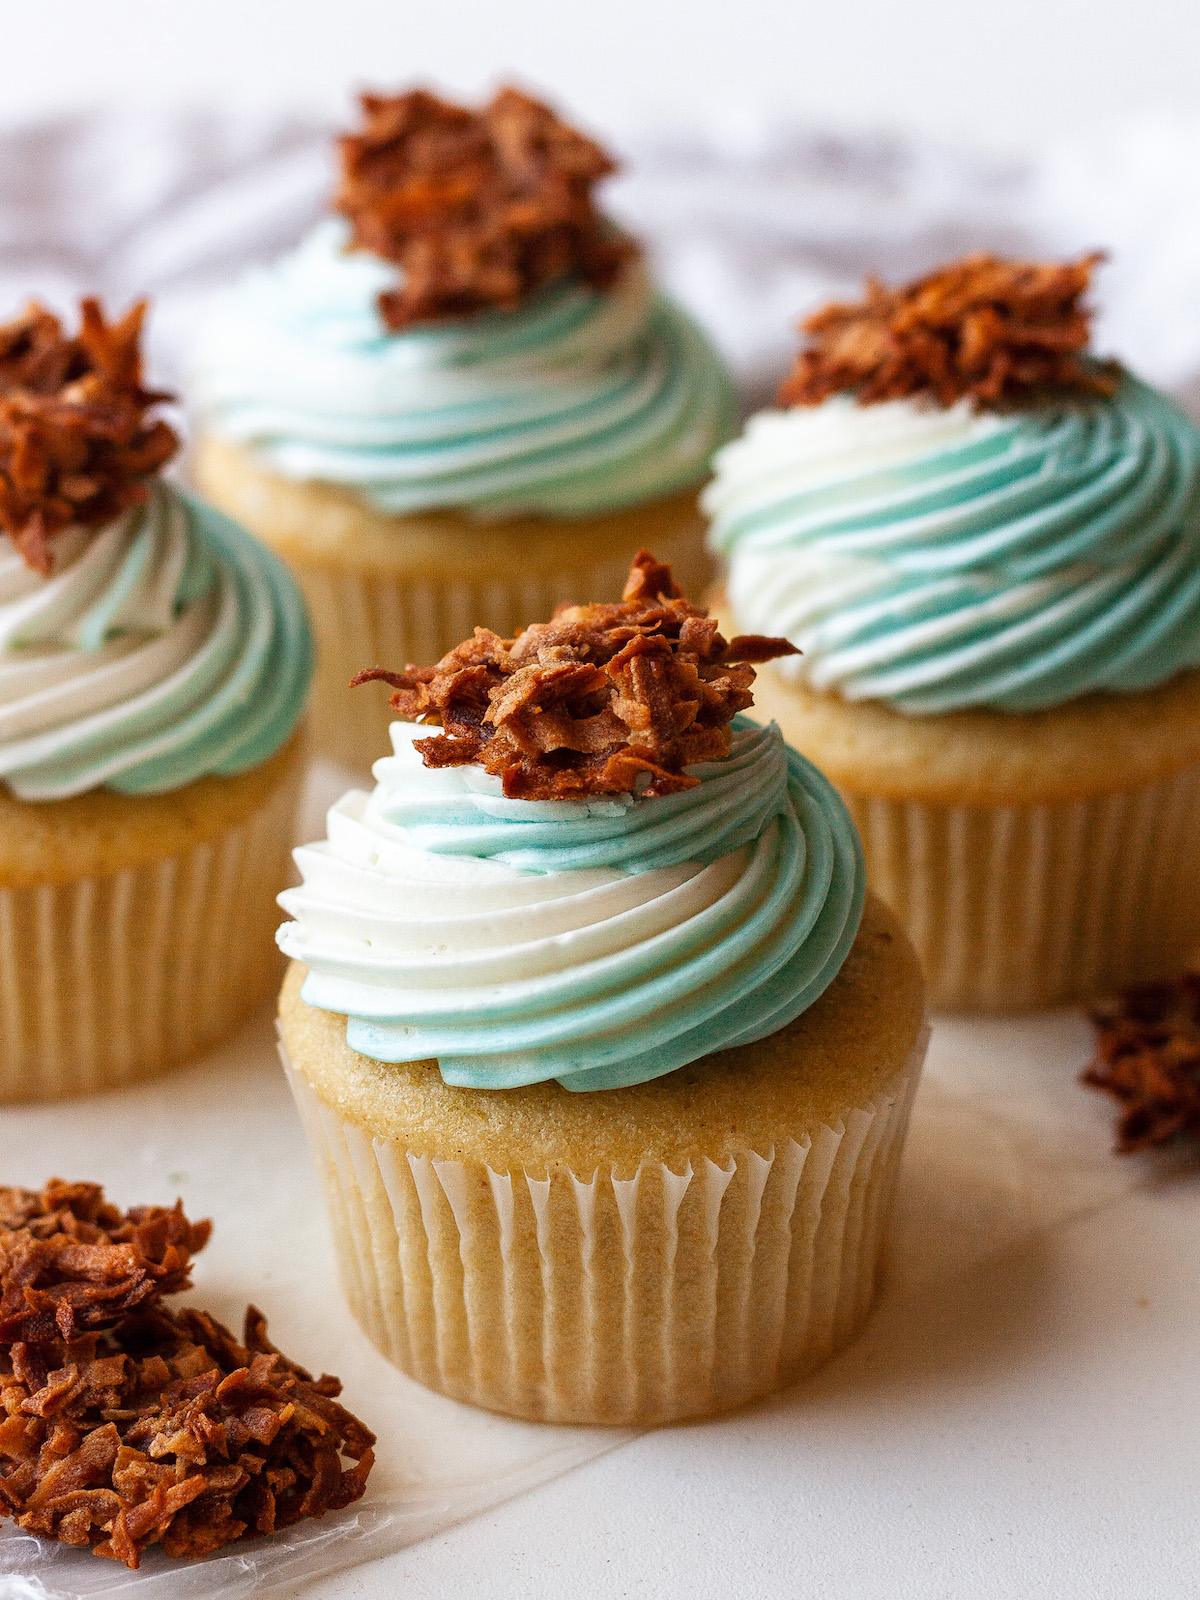
Sufganiyot Cupcakes
Makes 6 (can be doubled easily)
Ingredients
- 76 grams sugar
- 1 egg
- ½ teaspoon vanilla extract
- 40 grams neutral oil, like canola or vegetable
- 70 grams milk (any percentage works)
- 90 grams all-purpose flour
- ½ + ⅛ teaspoon baking powder
- ¼ teaspoon fine salt
- ⅛ teaspoon nutmeg
Directions
- Preheat oven to 350 degrees.
- Place cupcake liners in every other well of a cupcake pan so that six cups are lined.
- In a medium-sized bowl, whisk together the sugar, egg and vanilla extract until smooth and well combined.
- Add the oil and milk to the bowl and whisk well.
- Add the flour, baking powder, salt and nutmeg. Whisk gently until the batter is well combined and there are no lumps, but stop as soon as you have a smooth batter.
- Fill each cupcake liner three-quarters of the way full. If you want to get exact, each cupcake mold should hold 55 grams of batter.
- Bake the cupcakes for 18-20 minutes, until nicely domed. When you gently press the dome of a cupcake, it should spring back.
- Let cool in cupcake pan for 5 minutes, and then remove and finish cooling on a cooling rack.
- To fill the cupcakes, use a sharp paring knife to carve a cone out of each cupcake. Hold the knife at a 45-degree angle, cutting down while rotating the cupcake. Continue cutting and rotating until you’ve made a full rotation. Nudge the cone of cupcake up out of the hole you’ve made and set it aside. You won’t need these offcuts again, so feel free to snack on them!
- Add a spoonful of raspberry jam (or any flavor you like!) to each cavity in the cupcake. Fill the cavity all the way to the top.
- Frost and decorate the cupcakes (see recipes below).
Frosting
Ingredients
- 105 grams unsalted butter, soft at room temperature
- 175 grams powdered sugar
- 25 grams heavy cream
- ¼ teaspoon fine salt
- Blue food coloring (optional)
Directions
- Whip the butter with a handheld electric mixer or using a stand mixer with the paddle attachment. Whip for at least 5 minutes on high speed, until it’s very light and creamy.
- Add the powdered sugar and beat on low speed to combine. Then turn the speed to high and beat for another 5 full minutes.
- Add the cream and salt to the bowl. Mix on low speed to combine.
- Turn the mixer up to high speed and mix for 5 more minutes.
- You have three options for frosting color: You can leave the frosting white, dye all the frosting blue or make a blue-and-white two-tone swirl. If leaving frosting white, skip to step 8.
- To make blue frosting, add blue food coloring to your frosting until you achieve your desired color. Then skip to step 8.
- To make the blue-and-white swirl, transfer half the frosting to another bowl. Add a few drops of blue food coloring and mix well to combine. Lay a piece of plastic wrap on your counter, about 10 inches in length. Using a spoon or spatula, dollop some of the white frosting on the plastic wrap in a thick stripe. Add to the stripe until it’s about 8 inches long and 1-2 inches wide. Repeat these steps with the blue frosting, laying it down so that the blue stripe touches the white stripe. Grab one of the long ends of the plastic wrap sheet and start to roll it toward the other end, forming a cylinder with blue-and-white frosting inside. Once the tube has been formed, twist up each end of the plastic wrap to keep the frosting inside.
- Prepare a piping bag. If using a plastic piping bag, snip about an inch off the end. Place a large piping tip into the open end.
- Using scissors, cut one twisted end off the plastic-wrapped frosting tube. Place the tube, cut end down, into the piping bag. Squeeze gently to press the frosting down into the piping tip.
- Pipe a swirl of frosting on top of each cupcake, covering the jam wells.
- Garnish with gelt, gold sprinkles or mini coconut “latkes” (see recipe below).
- Frosted cupcakes will keep, stored well-sealed in the refrigerator, for up to five days. Remove them from the fridge and let warm up to room temperature before enjoying.
Mini Coconut “Latkes”
Ingredients
- 35 grams shredded sweetened coconut
- 1 egg white (about 25 grams)
- Pinch fine salt
Directions
- Preheat the oven to 350 degrees.
- Place shredded coconut on a baking sheet and bake for 5 minutes.
- After 5 minutes, toss the coconut around on the baking sheet to ensure it colors evenly. Bake for another 5 minutes.
- Let coconut cool for at least 10 minutes.
- Combine the toasted coconut with the egg white and a small pinch of salt. The mixture will seem crumbly and dry—that’s OK!
- Line a baking sheet with parchment paper.
- Dollop teaspoons of coconut batter onto the parchment paper. Use the back of the teaspoon to spread out the mound of coconut into a flat, round, mini-latke-like shape.
- Return the pan to the oven and bake for 12 minutes.
- Let cool fully on the pan.
- Remove cooled “latkes” from the baking sheet and use as cupcake garnishes!